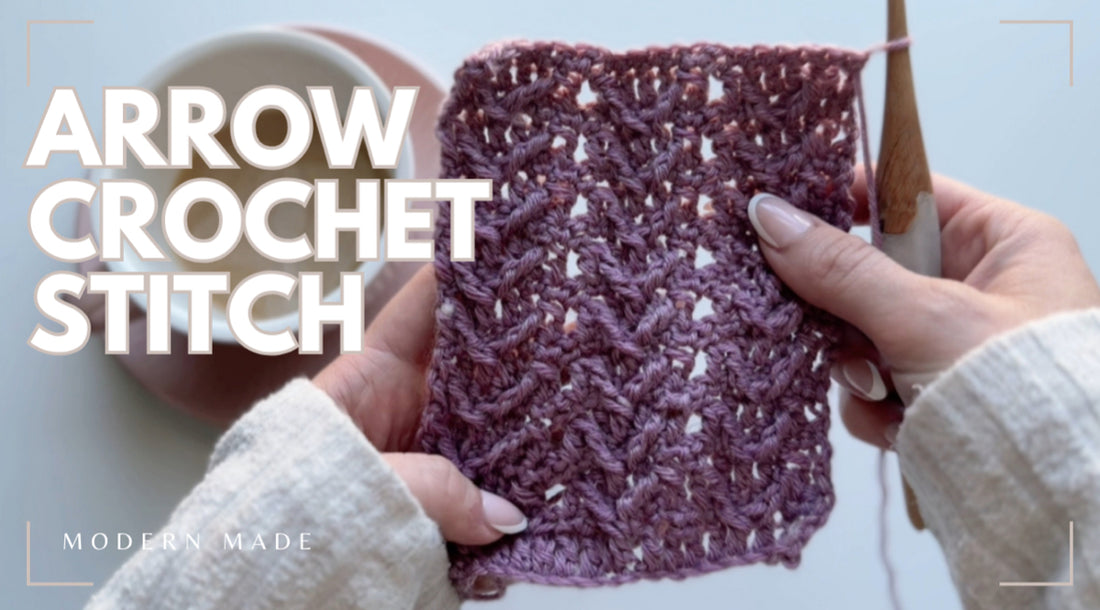
Learn to Crochet The Arrow Stitch
Share
How to Crochet the Arrow Stitch: A Step-by-Step Guide
This stitch pattern looks intricate and detailed, but in reality, it’s incredibly simple! It’s a two-row repeat that is perfect for those who are already comfortable with front post techniques. If you’re ready to try something new and beautiful, the Arrow Stitch is a great choice. Let me walk you through the process of how to create this stunning pattern.
Getting Started
To begin, you’ll need to chain a multiple of six plus three stitches for Row 1. For example, you might start with 21 chains (6 x 3 = 18, plus 3 = 21 chains total). The chain three at the beginning of the row will count as your first double crochet.
Row 1:
- Start in the third chain from the hook and work a double crochet stitch. Note that the chain three at the beginning counts as one double crochet.
- Work four more double crochets into the next four chains. This should give you a total of five double crochets (counting the chain three).
- Now, chain one and skip one stitch, then work a double crochet into the next stitch. You’ve now created the first section of five stitches.
- Work five more double crochets into the next five stitches (again, this forms a section of five).
- Continue to chain one and skip the next chain. In the following chain, work another double crochet.
- If your starting chain is longer, you’ll repeat the process for additional sections of five. But in this case, we are ending Row 1 with six double crochets (since you have six remaining stitches to finish this row).
You’ve now completed Row 1!
Row 2:
- Chain one and turn your work. We will be working single crochets in this row.
- Single crochet into the next six stitches, as you have six stitches at both ends of the pattern.
- When you reach the chain one gap, chain one and skip that gap.
- Single crochet into the next five double crochets.
- Keep the chain one gap open and skip that space. Work a single crochet into the next double crochet.
- Repeat this process all the way across Row 2, working into each section and keeping the chain one gaps intact.
- Finish with a single crochet into the last stitch, which will be the chain three from the beginning of Row 1 (remember, that counts as a double crochet).
Now you’ve completed Row 2, which is a simple row of single crochets.
Row 3:
- Chain three and turn your work. The chain three counts as a double crochet.
-
*Begin working a double crochet in next stitch like so: Yarn over, insert hook, yarn over, pull through loop, yarn over, pull through 2 loops. Stop there. There should be 2 loops on your hook.

- Begin working a front post treble crochet like so: Yarn over twice, insert hook from front to back around the post of the fourth double crochet 2 rows below. Yarn over, pull through the post. Yarn over, pull through 2 loops. Yarn over, pull through 2 loops. Yarn over, pull through 3 loops. This is the first half of the V complete.

- Peak behind the stitch you just made to double crochet in the next 3 single crochet of the row below.
- Begin working a front post treble crochet like so: Yarn over twice, insert hook from front to back around the post of the fourth double crochet 2 rows below (the same post you just worked around). Yarn over, pull through the post. Yarn over, pull through 2 loops. Yarn over, pull through 2 loops. Stop here. There should be 2 loops on the hook.
- Begin working a double crochet in next single crochet in the row below like so: Yarn over, insert hook, yarn over, pull through loop, yarn over, pull through 2 loops. Yarn over, pull through 3 loops.
- Chain 1, skip over chain 1 space in row below.
- Repeat from *across, until last 6 stitches, with the adjustment of working around the middle double crochet 2 rows below in the next section(s) of 5. When 6 stitches remain, repeat from *, ignoring the last stitch in the row when determining the “middle”. Do not chain 1, or skip over chain 1 space in row below (there isn’t one at the end of row).
- Work a double crochet in the very last stitch of the row.
Continuing the Arrow Stitch Pattern
Once you’ve completed Rows 2 and 3, you will repeat them until your project reaches the desired length. Row 2 is always the single crochet row, and Row 3 is the row that forms the arrows.

Final Thoughts
The Arrow Stitch creates a beautiful, textured pattern that works up quickly once you get the hang of it. It’s a fantastic stitch for blankets, scarves, or any project where you want a little more depth and interest.
This pattern is especially great with weight 3 yarn, as it creates just the right amount of texture without being too bulky. I hope this step-by-step guide helps you as you try out the Arrow Stitch in your next project.
What are you going to make with this stitch? Let me know in the comments below! You can find all of my crochet patterns for sale here or on Etsy at Modern Made Shop. Don’t forget to follow me on Instagram and TikTok for more bite-sized crochet tips and tutorials.
Happy crocheting!
